Help Center
How to confirm your website in Pinterest
Confirming that you own your website adds your profile to any Pin that came from your site. You'll also get access to website analytics so you can see what people are saving from your website.
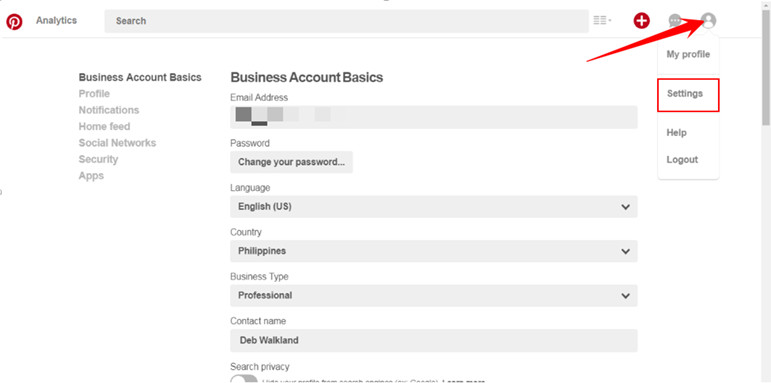
1. Log in to your Pinterest account and go to Settings
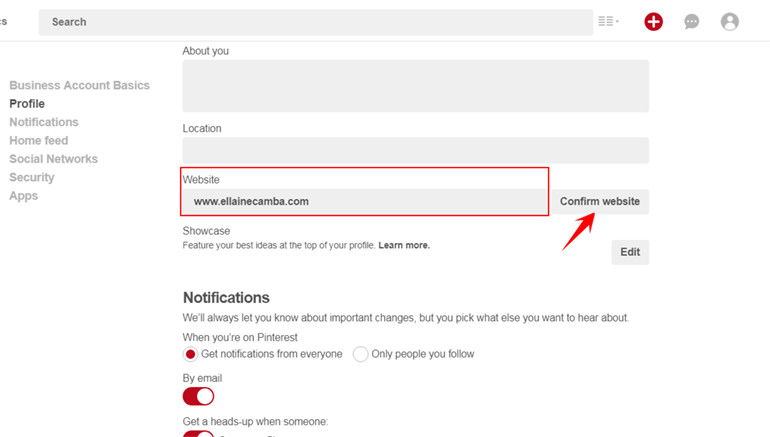
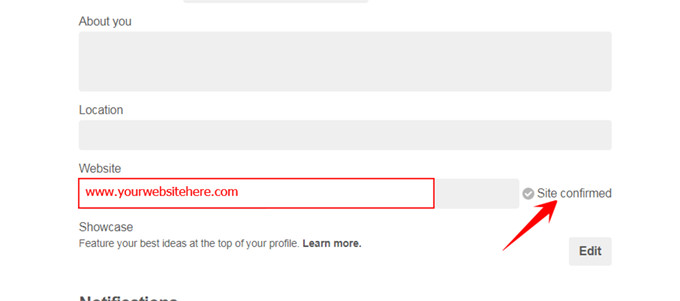
2. Scroll down to Website
>Enter your website
>Click on confirm website
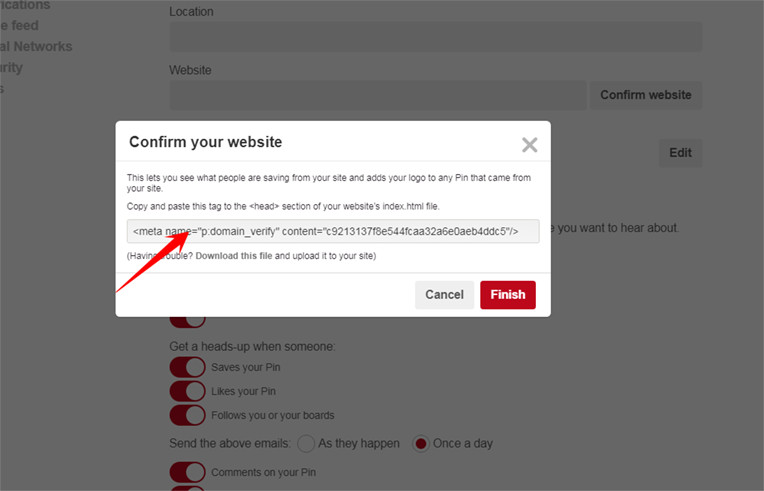
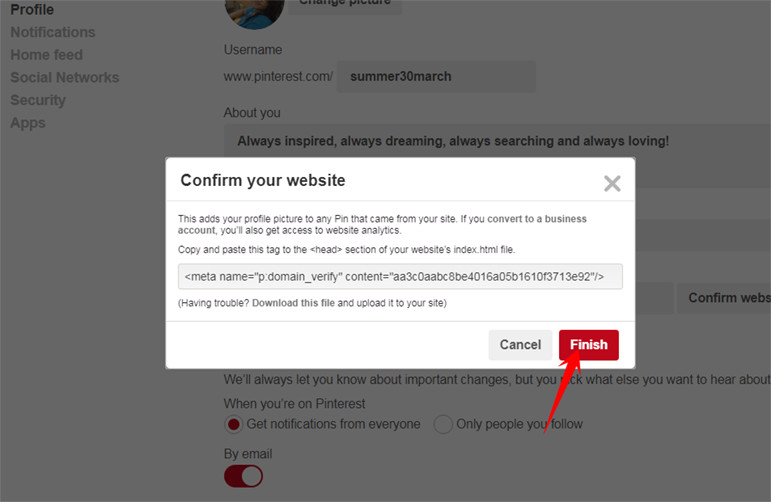
3. Highlight and copy the tag
4. Now, it's time to log in to your YFP account and paste the tag on your backoffice.
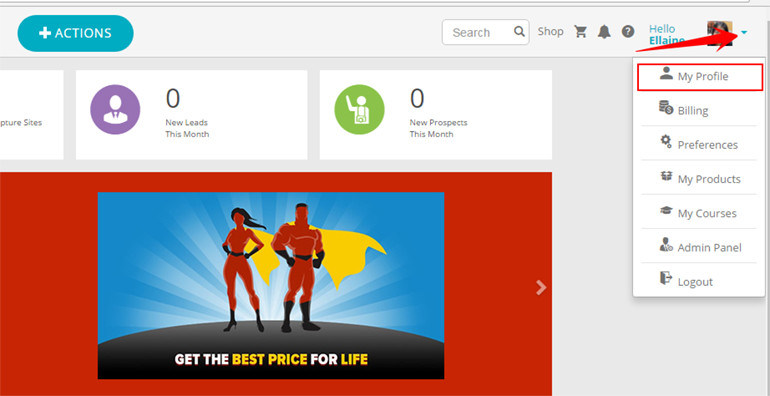
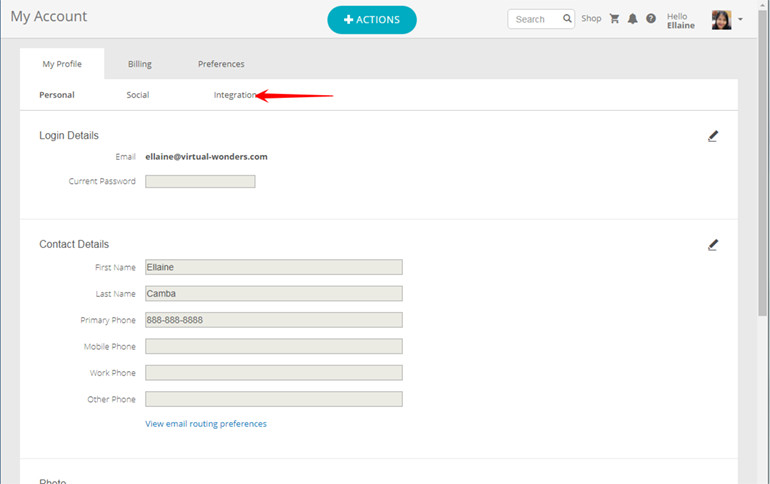
>Click on the dropdown menu found at the upper right corner of the page where you can see Hello Name.
>Click on My Profile
5. Click on Integration
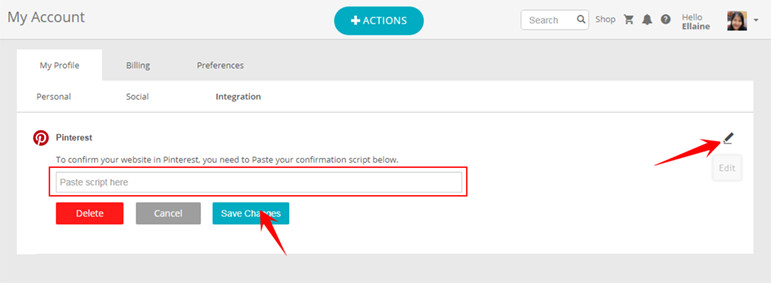
6. Click the pencil icon found at the upper right of the page.
>Paste the tag on the box provided
>Click Save Changes
7. Go back to your Pinterest account and click on Finish
8. There will be an alert saying that Pinterest is working on confirming the site. Just click on
Okay.
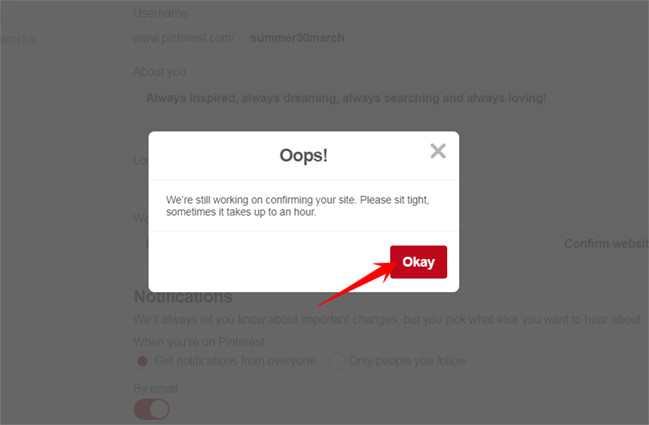
You should already see that the Site is confirmed after refreshing your page.
1. Log in to your Pinterest account and go to Settings
2. Scroll down to Website
>Enter your website
>Click on confirm website
3. Highlight and copy the tag
4. Now, it's time to log in to your YFP account and paste the tag on your backoffice.
>Click on the dropdown menu found at the upper right corner of the page where you can see Hello Name.
>Click on My Profile
5. Click on Integration
6. Click the pencil icon found at the upper right of the page.
>Paste the tag on the box provided
>Click Save Changes
7. Go back to your Pinterest account and click on Finish
8. There will be an alert saying that Pinterest is working on confirming the site. Just click on
Okay.
You should already see that the Site is confirmed after refreshing your page.


